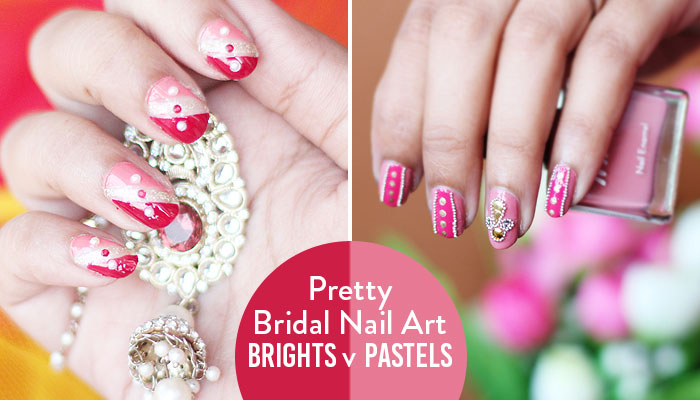
The wedding season is here! Bridal trousseaus are being assembled feverishly; pretty lehengas, designer baubles, make-up trials et al. Amidst all the head-to-toe bridal pamper sessions, take a few moments to check out two pretty tutorials that transform simple nails into dainty works of art. The first tutorial is for the traditional and contemporary bride who loves all things red and maroon. A dash of glitter and pearl gives the much needed bridal finish. The second option is for pastel-loving brides. The added touch of metallic stones and beads makes the entire look very ethnic and pretty. You may want to change the color of the base to match your outfit and taste. The accessories for this nail art can be shopped from your local craft shop or online stores. I have tried to give explanation and clear photos for every step so that each one of you can try this tutorial easily at home and save on expensive salon appointments.
Read on for bridal nail art ideas for your special day:
Traditional Bright Bridal Nail Art
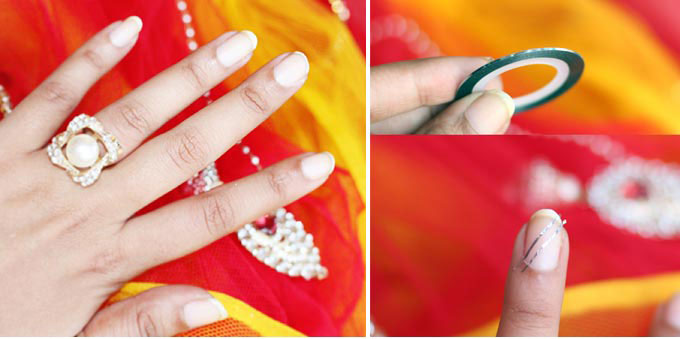
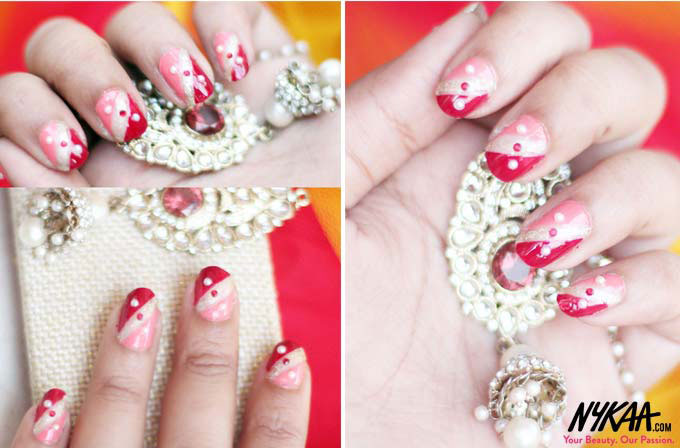
- Step 1: Start with clean, shaped and buffed nails. Apply a transparent base coat and allow it to dry. Apply two thin strips of tape/cello tape diagonally as shown leaving a small gap in between.
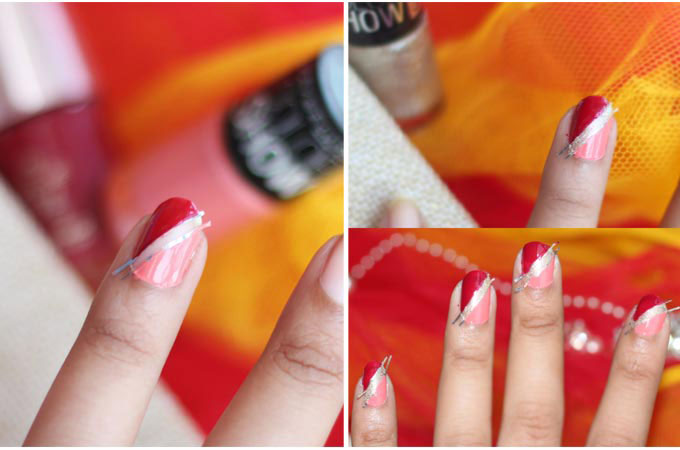
- Step 2: Choose two base colors matching your bridal outfit. I am using a maroon Lakme 9 to 5 Long Wear Nail Color-Red Alert and a coral color Maybelline Color Show-Coral Craze on either side of the tape.
- Step 3: Apply gold glitter nail paint Maybelline Color Show Glitter Mania-All That Glitters in between the gap of tape. Allow the nail polish to dry thoroughly.
- Step 4: Swiftly remove the tape pulling in one direction. Apply a transparent top coat (Inglot Diamond Top Coat) to seal your handiwork.
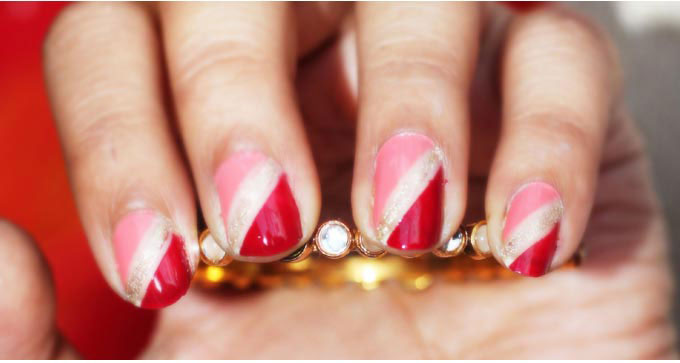
- Step 5: To accessorize the look I have applied red rhinestones and white pearls as shown in the image. Seal the stone work with another layer of top coat and allow the nails to dry for at least an hour.
Pretty Pastel Bridal Nail Art
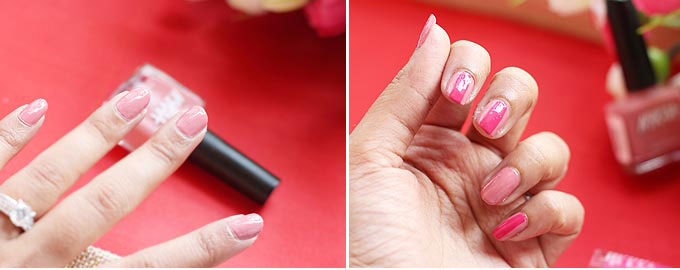
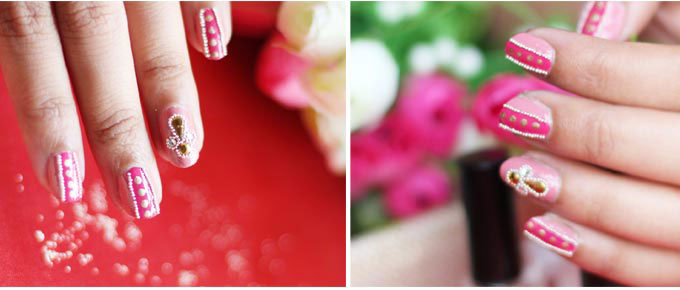
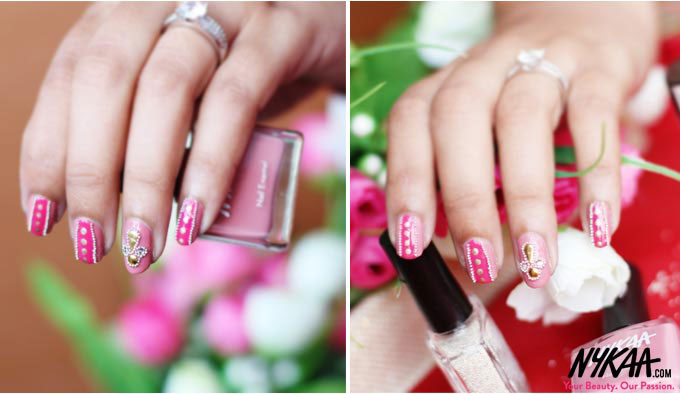
- Step 1: Start with clean, shaped and buffed nails. Apply a transparent base coat and allow it to dry. Apply a pastel nail color of your choice. I chose a pretty dusty rose color Nykaa Pastel Nail Enamel- Rose Sherbet.
- Step 2: Apply a contrasting shade of your choice in the middle of your nails. I am using Maybelline Color Show- Hooked-on-Pink. Please do not apply on the ring finger.
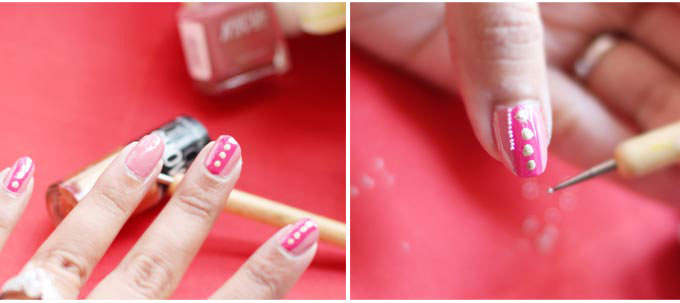
- Step 3: Now use a golden shade like the Maybelline Color Show- Bold Gold to apply four dots on the middle pink line.
- Step 4:Apply a transparent top coat and before it dries grab some gold/silver tiny beads and apply them in a straight line using a toothpick/dotting tool.
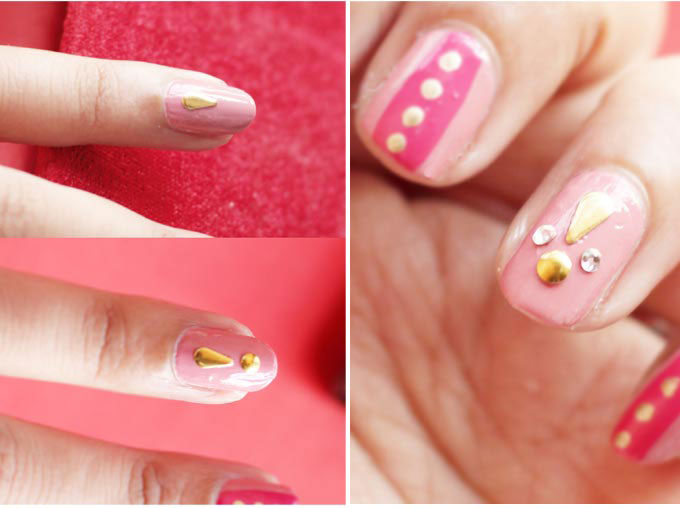
- Step 5: Coming to the ring finger, I thought to accessorize it differently. I am using some pretty gold metal drop-shaped and round decorations in the middle of the nail. I have used crystal stones on the side to give a contrast effect to the gold embellishments. Using the tiny beads, I have outlined all these decorative stones to highlight the entire look. Apply a top coat to seal all your hard work.
I hope you enjoyed the nail tutorials as much as I did. Do try these for your big day and let us know how they turned out.
Read more about the best bridal nail art ideas: