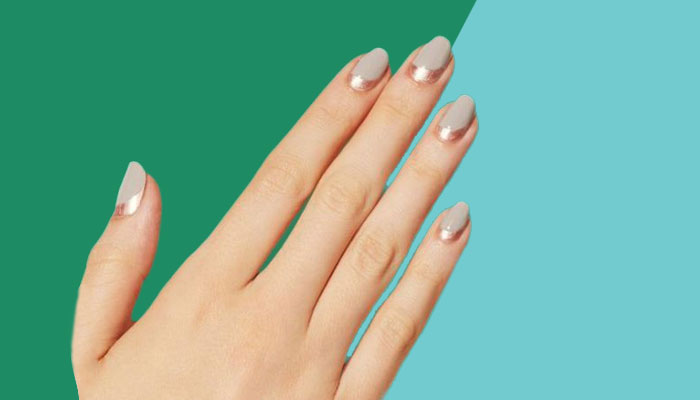
From inter-galactic pinkies to holographic tips, here are the top five festive nail art ideas that’ll have you shook this season. The best part - shimmer, shine and glitter – all feature on our list of Insta-worthy manicure designs sans a trip to the salon.
P.S. They look like a million bucks at the fraction of the cost.
Top 5 Glitter Nail Art Designs
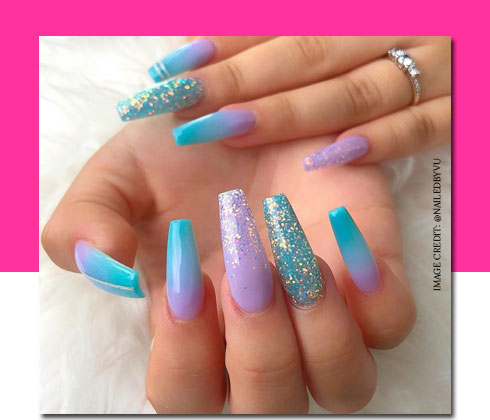
1. Unicorn-Ombre Anyone?
Looking to upgrade the usual unicorn nail to something chicer? This expert-level ombre glitter nail art design is ideal.
- Step 1: Start off with applying tape around the entire nail to protect from overspill and use Odiva Gel Finish Nail Polish - Lavender Aroma as base coat.
- Step 2: Next, apply Kiko Milano Smart Nail Lacquer - 27 Pearly Light Blue to a flat surface and using a latex sponge, dab the color on your pinkies for a true gradient look.
- Step 3: Use a clear topper as the final ombre-sealant; melting the colors together for a seamless finish and, lastly, sprinkle fairy-dust glitter nail paint on a nail or two using Nykaa Star Studded Glitter Coat Nail Enamel - 226 Golden Ticket
Easy step-by-step tutorial for this glitter nail art design
2. Playful Neutral Accents
Calling all the neutral-lovers out there! This sophisticated version of the cool-nude will have your heart swooning.
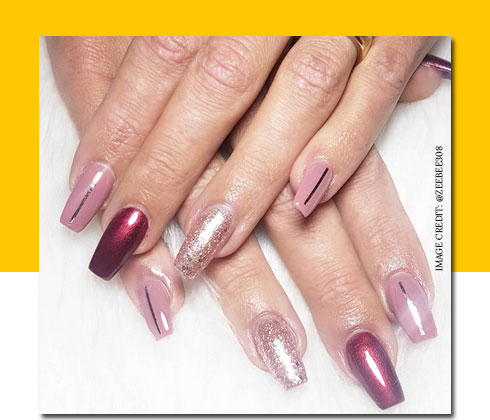
- Step 1: Start off by applying a pinkish-nude such as Paese Cosmetics Nail Polish – 397 as the perfect base coat.
- Step 2: Then, play up the drama with metallic maroon accents on your middle fingers in O.P.I Nail Lacquer - Miami Beet for a blinding high-shine.
- Step 3: Lastly, rose gold studded glitter, courtesy, Ellement Co. Just-A-Minute Glitter Gel Nail Polish finishes off the entire ensemble with a hint a sparkle.
- Pro Tip: Pick your favorite muted polish as base but add monochrome magic by matching your accentuated tip to your outfit.
Easy step-by-step tutorial for this glitter nail art design
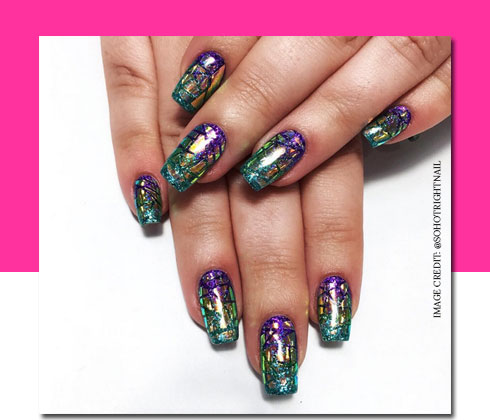
3. Mermaid-y Holographic Tips
Can’t decide between glitter, ombre and gilded tips? Combine all the latest trends together for this fancy festive manicure that’s screams mermaid-esque.
- Step 1: As usual start off with a green glitter base using Colorbar Arteffects-Denim Wash - Skinny
- Step 2: Then, use a latex sponge to apply Lakme Color Crush Nail Art - G12 + Nail Polish Remover Combo as the transition shade close to the cuticle.
- Step 3: Cinch your dual-toned tips with Kiko Milano Gel Effect Top Coat that guarantees an electrifying shine and lastly, pin down nail strips in random linear designs.
- Step 4: Fill these up with a dash of soft gold to highlight the (purposely-messy) multi-dimensional look Your pretty festive nails are good to go!.
Easy step-by-step tutorial for this glitter nail art design
4. Graphic-Geometric Pink
Give red a miss this festive season ’cos hot pink is all set to mesmerize. Not for the faint of heart, this rad mix of pinks are all set to prep you to party.
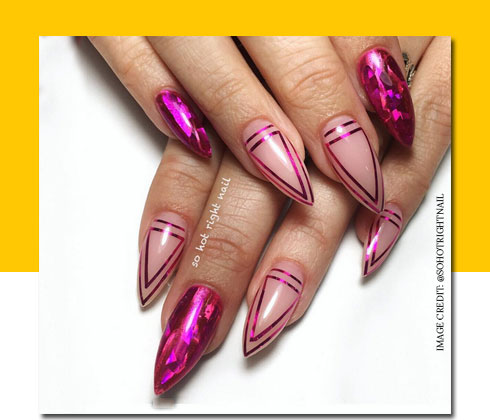
- Step 1: First off, embrace the simplicity of a soft pastel hued base with Essence I Love Trends Nail Polish The Pastels
- Step 2: Follow it up with nail strips in a triangular fashion to mimic the minimal chevron design. Start applying polish over the strips with Dazller Eterna Precious Nail Glitter - 05 Berry And Currant that’s chockfull of glitter particles to complete that mirror-shine.
- Step 3: Lastly, just to accentuate a few tips remove the stickers and apply the glitter-coat on the whole nail.
- This way, there’s a hint of holographic pink that doesn’t look OTT because of the combination of subtle pink and loud shimmer. Honestly, it’s not as complicated as it sounds, trust us.
Easy step-by-step tutorial for this glitter nail art design
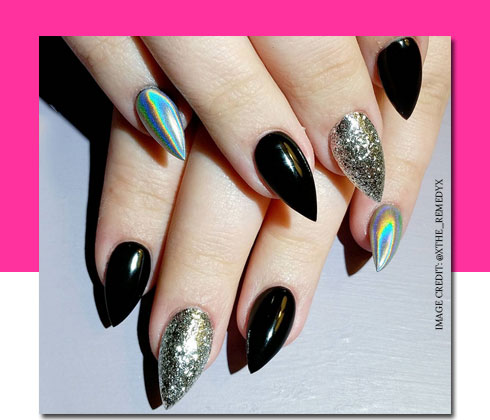
5. Goth-Glam for the Finish
Unleash your inner rock-goddess as you amp up the drama four-fold with this glitter nail art design. With a mix of black and silver in multiple textures, this is a sure-fire way to let your pinkies steal the show.
- Step 1: First off, buff away with Toniq Buff Me Pretty Nail Care Set so that your tips are looking sharp AF.
- Step 2: Then, apply Nykaa Black To Gold Nail Enamel - Night Fever 229 on only your pointers and ring fingers.
- Step 3: Next douse your middle fingertips with Nykaa Nail Enamel - 227 Silver Snow for that inter-galactic glaze.
- Step 4: Lastly, complement the stark black with unconventional silvery vibes with Nykaa Unicorn Potion Nail Enamel - Sugar n Spice, No. 235