In This Story:
We are completely with you on the idea of not blowing up money in a fancy nail art studio for something so temporary. Yes, a decent manicure is important in life, but nobody said you can’t DIY it, honey. There are so many easy nail art designs to do at home and we’ve picked just the right ones for all you beginners out there. Presenting simple nail designs that’ll awaken the artist in you.
The best part, however, is that you need no nail art tools to perfect these easy nail designs.
Explore Easy Nail Arts To Try At Home
1. Accent Nails
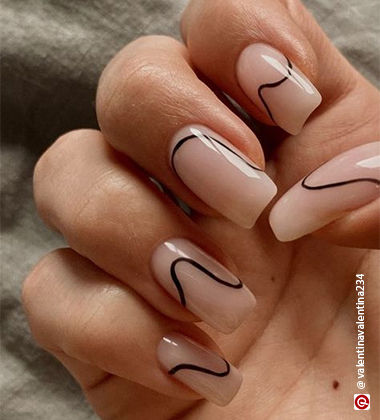
How do you know a word in English has an accent, that little squiggly line on top, right? Just like that, add simple squiggles to make your nails more exotic and have that little flair you need.
What You Need:
2. Notebook Nails
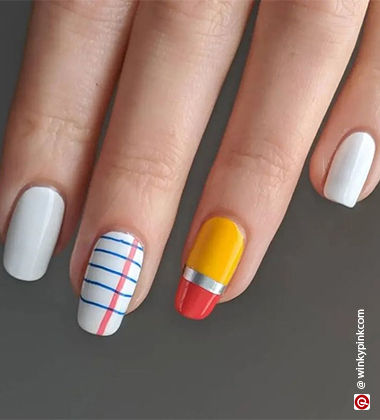
Back-to-school is near, and these notebook nails are a great way to enter the new academic year with a fun vibe and cute nails. Simply use some tape and a thin brush to create these fine lines.
What You Need:
3. Lavender Milk Nails
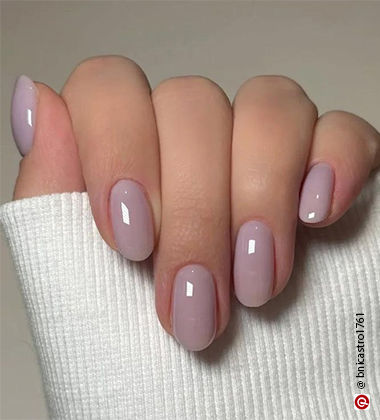
Soap nails are the next big trend when it comes to the old-money, rich-wife manicures. From Meghan Markle in With Love, Meghan (2025) to Selena Gomez in her impromptu Prom photoshoot, we are seeing several celebrities harp on this new fad. Mix it with a dash of lavender love, and you will have yourself a lavender milk nail for any reason or season. Start with a white base, and layer it with a lavender hue to lighten it further. Finish with a top coat for that extra sheen.
What You Need:
4. Blue Aura Nails
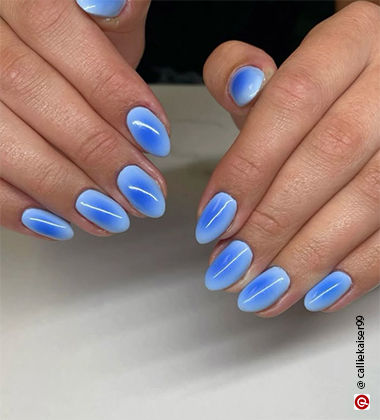
What seems to be daunting at first can be super simple once you get the technique in place. All you need is a light blue base, then some darker hue of blue on a cotton pad, a simple dab in the middle of the nail, and finally a top coat to seal the deal. That’s it, your mystic blue aura nail is ready to rock any event.
What You Need:
5. Moody Mauve Nails
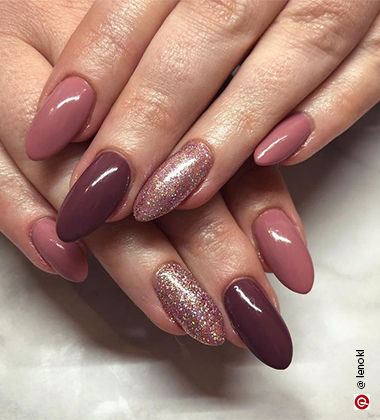
If you can’t decide between pink and purple, try mauve. This colour is perfect for muggy and cold weather alike. With a hint of sparkle in your accent nail, and there you have it, a jazzed version of an otherwise humble colour.
What You Need:
6. Textured Nails
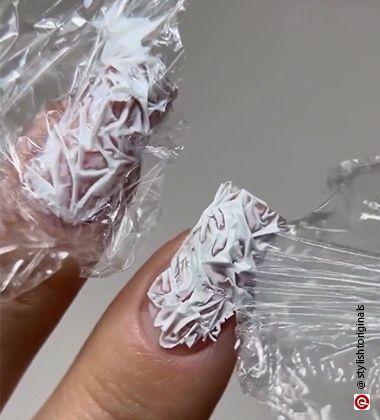
When we imagine nails, we only think of smooth, glossy nails. But you want to experiment with something out of the box.
What You Need:
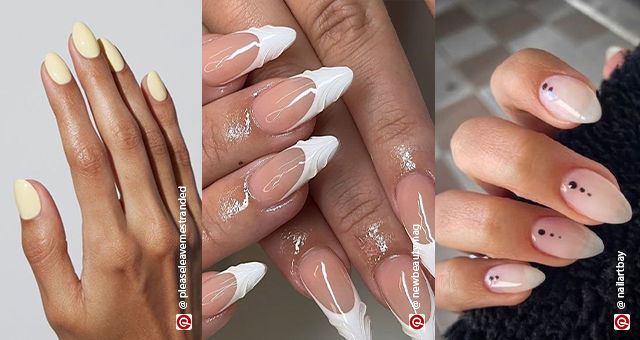
7. Butter Yellow Nails
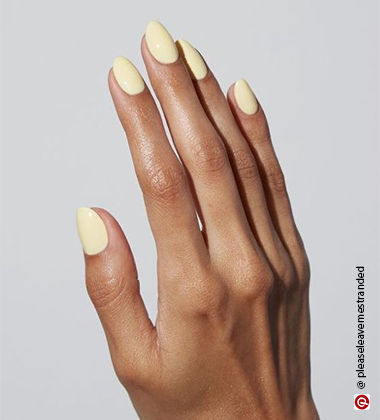
If you are tired of extravagant nails, these very on-trend nails you can try. Butter yellow and baby blue are the next best colours if you want to be on theme for any pop event.
What You Need:
8. Chocolate Nails
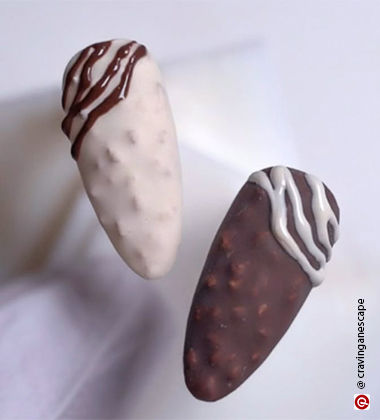
Chocolate nails are more than just brown-coloured nails. You can create a 3-D effect of real-looking chocolate and with a few chocolate drizzlers and there you have it, almost edible nails.
What You Need:
9. BB Cream Nails
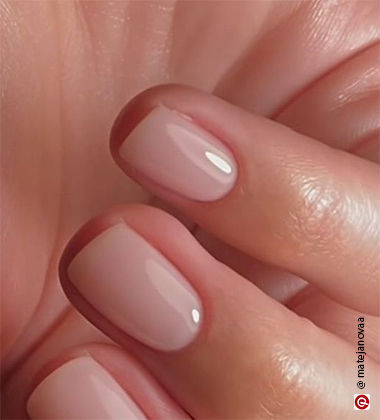
Just like a BB cream (Beauty Balm) that is light on your skin that bridges the gap between makeup and skincare, this simple nail art design is also so elegant, they almost look like your natural nails.
What You Need:
10. 3D Nails
This is actually the most simple nail art design you can do as compared to the daunting look it gives. All you need is the right product and a whole lot of patience. Start with a simple base colour. Let it dry. Apply a thick layer of transparent colour in your desired shape to create a 3D design.
What You Need:
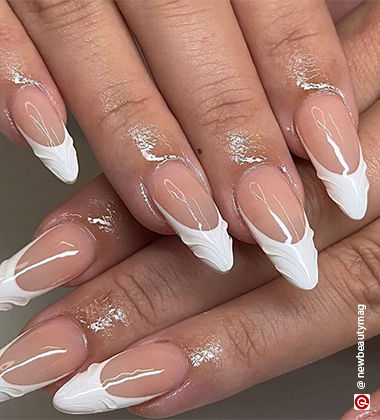
11. The French Manicure
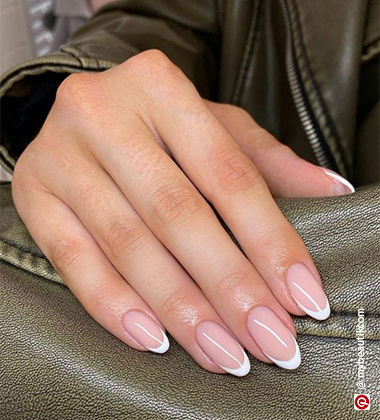
Did you know that this classic manicure is also an incredibly simple nail art design? All you need is some scotch tape and you’re sorted.
What You Need:
12. Designed With Dots
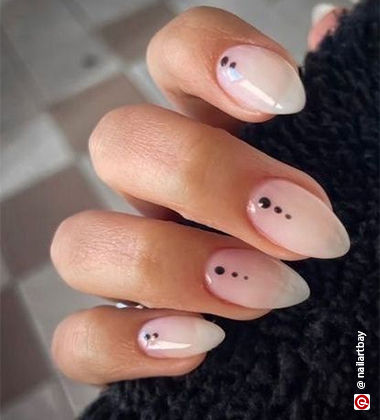
All you need is a bobby pin and a toothpick. Minimalistic nail art designs are trending right now, and the best part of this is the fact that it is such an easy nail art design. Wondering how to do nail art with dotting tools? We’ll show you how.
What You Need:
13. Striped Beauty

Stripes look super classy, but sadly, most women believe that you need a full-blown set of nail art stripes to pull off this nail art at home. Here’s how you do it. Start with an almond crumble base, add thin metallic strips or use a fine brush to freehand the lines yourselves, and finally add a top coat.
What You Need:
14. Stenciled With Love
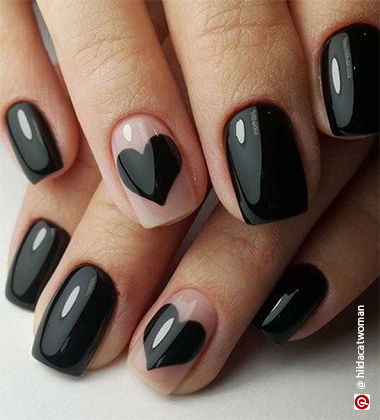
Most of the easy nail art designs to do at home have a cutesy heart as their highlight. And nope, acing that heart isn’t as tough as it looks. Use a glossy black gel polish for this design. Follow it by painting all your nails, except the one on your ring finger. Using a regular stencil, draw and cut out a heart on a piece of cardboard. The sturdier your makeshift stencil, the crisper the heart. Place this heart-shaped paper on your accent nail and paint within. Remove the stencil to reveal your work of art.
What You Need:
The Right Manicure For The Right Place
What’s a bigger question than ‘how to do nail art’? Which design to select! Most women overlook the glaring fact that not all designs are versatile and go well with their surroundings. Like, too much glitter in a workplace is an obvious faux pas.
Here’s the ultimate nail look book that you need to bookmark before you start with nail art at home.
Best Easy Nail Art Designs for Different Occasions
1. Ideal For Work Wear
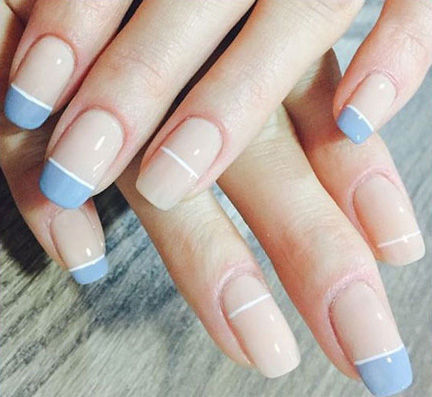
This muted and easy nail art design goes beautifully with your crisp work wardrobe. Follow these steps to get beautiful and simple nail art.
Step 1: Start by painting your nails with Nykaa Salon Shine Gel Nail Lacquer - California Dreams 223.
Step 2: For the blue tips, go with Untamed Amsterdam from the same range.
Step 3: Use white nail art stripes to add the finishing touches.
2. Brunching With The Ladies
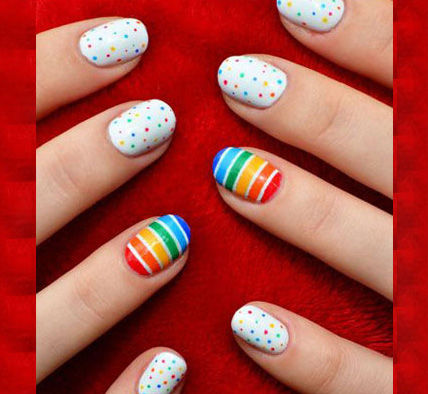
This is such a vibrant nail art design; your girlfriends totally deserve this on a fun day outing.
Follow these steps to get beautiful and simple nail art.
Step 1: Start by painting your nails (except the accent nail) white with the Miss Claire French Manicure Kit With Acrylic Box.
Step 2: Using the same acrylic range and a toothpick, create dots of different sizes.
Step 3: Since your accent nail needs to resemble a rainbow, create horizontal stripes of the same colours with white nail art stripes between segments.
3. Boozey Nights 101
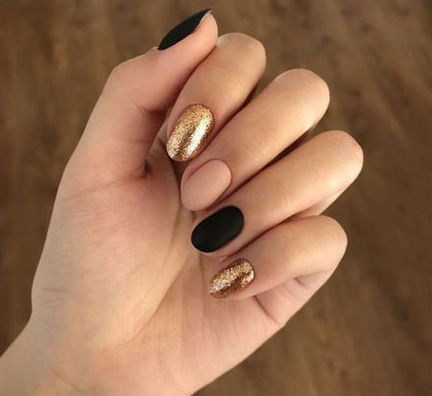
For nights, you want a mani that’s attention-grabbing and does complete justice to your blingy ensemble. Follow these steps to get beautiful and simple nail art.
Step 1: Start this nail art DIY by painting two nails with the Swiss Beauty Stunning Nail Lacquer - 84 Brady Blue.
Step 2: One nail should be nude, so use the Nykaa InstaLike Long Lasting Nail Enamel - Beige BTS 350.
Step 3: The rest of the two nails should be totally glitter-studded, so use the Nykaa Star Studded Glitter Coat Nail Enamel - 226 Golden Ticket.
Parting Thoughts
Whether you are looking for a simple nail polish design or want to build your nail art kit, with just a few colours and shades that you can create some amazing patterns. From a humble squiggly line on top to rhinestoned 3D nails, these designs are amazing and unique for different occasions and events.
FAQs
-
What are some easy nail art designs for beginners?
Some easy nail art patterns for beginners are:
- Stripped
- Dots
- Ombre
- Angel Halo
- French Manicure
-
How do I make nail polish last longer at home?
If you want to make your nail polish last longer at home, apply a layer of top coat that keeps your hue intact even under water and during strenuous physical activity.
Nykaa Recommends:
-
Are there any beginner-friendly nail art kits?
There may not be a specific kit that suits your taste and liking, so you can create your own kit. Here are a few things to add to your nail kit.
Nykaa Recommends:


.png)