So, you have finally secured your dream wedding venue, finalised the guest list, booked your MUA and picked up that bridal trousseau, you have been obsessing over since months now (phew). The only thing left to do is to treat yourself to a relaxing spa day (adios stress) and choose a fabulous manicure to complement your look on your D-day; however, we aren’t talking about the run-of-the-mill nail polishes that you have worn everyday of your life. Enter gorgeous bridal nail art that can be customised to match your ensemble and give you those perfect wedding nails; think stunning gold-traced tips, miniature floral designs, stylish glitter nails or even OTT embellished nails that are anything but basic. Looking for understated wedding nail art to suit your minimal sensibilities? Opt for elegant French manicures (with a twist), polished chrome nails or even a tiny tattoo-style text on each nail to make a statement.
Lucky for you, there are numerous bridal nail art designs out there, each tailor-made for every kinda bride. To make your life easier, we have rounded up some gorgeous wedding nail art that will match your different wedding looks and themes to a T.
Are you ready for some swanky wedding nail inspo? Read on for some gorgeous bridal nail art ideas:
Top Bridal Nail Art Ideas
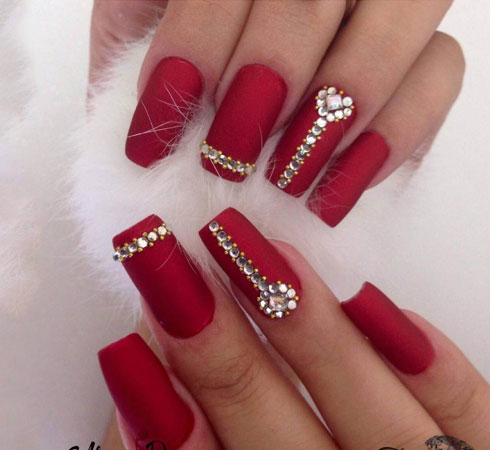
1. Bridal Nail Art for “The Traditional Bride”
There is nothing like gorgeous reds or metallic golds to make your tips look like a million bucks. Plus, these hues complement your ensemble better than anything else. You can also opt for something sparkly such as tiny crystals or colored stones to add that extra oomph. If we haven’t said this before, more is definitely less (especially when bridal nails are concerned). Our pick: Dazzling embellished nails that will make your evening sparkle like no other.
- Step 1: Start by applying two coats of Maybelline New York Color Show Bright Matte - Brilliant Red.
- Step 2: Next, apply a small amount of Maybelline New York Superstay Primer Protecting Base Coat to the nails where you like to place the embellishments. Use this: Nails&More Nla-19 Nail Art Stone Wheel and use a toothpick to secure the nail decorations in place.
- Step 3: Finish off with a generous coat of O.P.I Top Coat.
Follow these steps to get the perfect bridal nail art
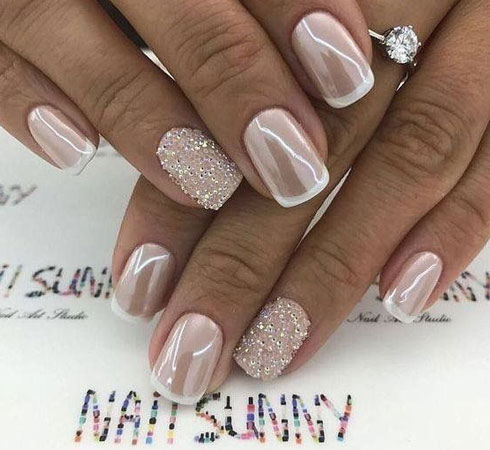
2. Bridal Nail Art for “The Minimalist Bride”
If elaborate bejewelled nails ain’t your style, then the classic French manicure is just what your beautician ordered. However, we recommend adding some pizzazz to your wedding nail art, in the form of the interesting elements such as some glittery sprinkles or abstract brush strokes to make an understated statement.
- Step 1: Start by applying a coat of Kiko Milano BB Base Coat on all your nails to even out the nail surface.
- Step 2: Apply two thin coats of the neutral colour (subtle pink) on your entire nails. After it’s completely dry, place a thin strip of scotch tape on the area separating the tips. Paint your tips with the white nail paint; remove the strip when the nail paint dries. We love the Miss Claire French Manicure Kit - Black Boxthat features a subtle pink and a bright white matte for the tips.
- Step 3: Mix clear nail paint with the embellishment/glitter of your choice like the Nails&More Nla-26 Glitter Set and coat the nails of your ring finger.
- Step 4: Finish with a top coat of Wet n Wild MegaLast Hard As Ice Top Coat, running it along the edge of the tip to cap the nail as this will help prevent chipping. To extend the life of your French manicure, reapply a top coat every 2 to 3 days.
Follow these steps to get the perfect bridal nail art
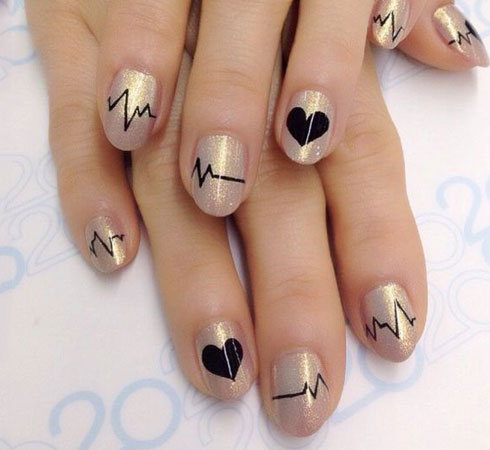
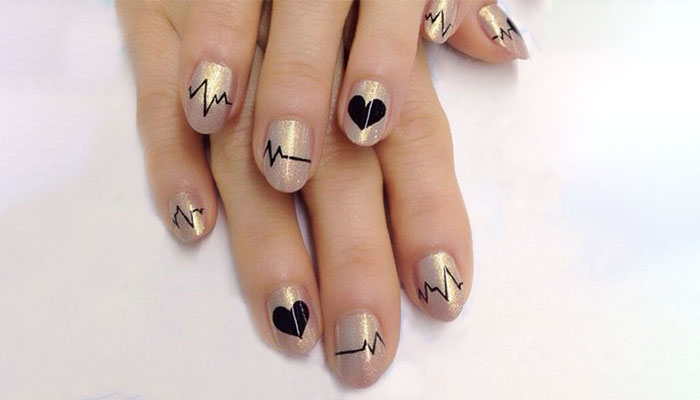
3. Bridal Nail Art for “The Edgy Bride"
If you are the one, who loves experimenting with new products and styles every day, then we recommend opting for bridal nail art designs that mean something; think something bold, sparkly and stunning that emotes what’s exactly in your mind. Lucky for you, you can customise these designs according to your sensibilities. Currently, we are hearting tattoo-styled designs that are a perfect example of a ‘picture is worth a thousand words’.
- Step 1: Start by applying the Innisfree Nail Base Coat Innisfree Nail Base Coatfor an even application.
- Step 2: Swipe on two coats of Nykaa Gold Rush Nail Lacquer - Champagne Gold 122on all the nails.
- Step 3: Using a thin brush make patterns of your choice with the Wet n Wild 1 Step WonderGel Nail Color - Power Outage.
- Step 4: Finish with a top coat of Nykaa Nail Care - Shine On Top Coat
Follow these steps to get the perfect bridal nail art

4. Bridal Nail Art for “The Princess Bride”
If your wedding ensemble is fashioned out of delicate tulles and soft pastels, then it’s only fitting to choose a bridal nail art that is equal part elegant and understated. A nail art that is a combination of pastel pinks and glittery golds make for a dreamy combination. What’s more, you can also wear this for a fun day wedding.
- Step 1: Always start off with a base coat like the Jaquline USA Double Use Top & Base Coat to make your manicure last longer.
- Step 2: Next apply two coats of the Lakme Absolute Gel Stylist Nail Polish - Ivory Duston every alternate finger, or as per your choice. Apply Nykaa Star Nail Enamel - 225 Boujee Rose Goldon the remaining fingers. Apply Wet n Wild 1 Step WonderGel Nail Color - Flying Colorson the nail of the pinky finger.
- Step 3: You can also create patterns with the three nail paints and some tape, that you can remove once your manicure has dried.
- Step 4: Finish off with a coat of Essence Gel Nails At Home Clear Gel Top Coat.